Hey there, it’s Mike from the aluminum foil tape side—been in this game for over 8 years, and let’s be real: nothing’s more frustrating than grabbing a roll of tape, getting all hyped to finish a job, and then it’s bubbling, wrinkling, or peeling off 2 days later. I’ve seen homeowners, small contractors, even some big shop foreakers mess this up, and 9 times out of 10 it’s not the tape’s fault—it’s how they apply it. That’s why today I’m breaking down exactly how to lay aluminum foil tape smooth as butter, no mess, no headaches. Aluminum Foil Tape

First off, let’s get one thing straight: not all aluminum foil tape is made equal. I know, I know—if you’re a newbie, you probably think every roll looks the same. But trust me, the kind you use for HVAC ductwork is way different from the stuff for patching a shiny metal roof, or even sealing food containers (though that’s a whole other vibe). I’m talking about the heavy-duty stuff we supply here— it’s got a acrylic adhesive that sticks to almost any clean, dry surface, not that cheap rubber-based junk that turns gummy in heat or peels off when it gets cold. But even the best tape won’t save you if you skip these basics.
Let’s start with prep—this is the part most people skip, and it’s the #1 reason their tape fails. You can’t just yank the tape off the roll and press it down; if the surface’s got dust, grease, moisture, or even loose paint, that tape’s gonna lift like a bad band-aid. I’ve seen a guy try to patch a leaky AC duct right after painting the basement wall—he wiped it down with a old rag he kept in his toolbox, which had oil on it. Two weeks later, the tape was hanging in strips, and the guy came back mad thinking our tape was garbage. Nope—prep was garbage.
So what’s the right prep? First, clear the area. If you’re working on a duct, move any tools, dust rags, or loose debris away so you have a clear line of sight. For metal surfaces, a quick wipe with isopropyl alcohol works best—get rid of all that grime. If there’s rust, you gotta sand that down first; tape won’t stick to flaky rust. And if it’s damp? Wait for it to dry. I once tried to apply tape to a slightly wet metal roof once during a random drizzle—waste of a whole roll, stuck for 10 minutes then slid right off. Patience here pays off.
Next, temperature. Aluminum foil tape’s adhesive is sensitive to temps. If it’s super cold (like below 50°F/10°C), the adhesive gets stiff and doesn’t spread right. If it’s way too hot (above 90°F/32°C), it can get too goopy and maybe even lift off later. If you’re working in cold weather, keep the tape inside your truck or house for 15 minutes before using it to warm it up. If it’s hot, try to work in the shade—don’t lay tape in direct midday sun if you can avoid it. That tiny step makes such a difference.
Now, the actual application part—this is where the smoothness happens. Let’s start with cutting the tape right. Don’t just yank it off the roll with your teeth (though I’ve definitely done that when I’m in a hurry). Use a utility knife or scissors, and cut a piece that’s 2-3 inches longer than what you need. Why? Because if you leave a little excess on each end, you can seal the edges better and have a tab to pull if you mess up the first application. Pro tip: don’t cut it too short—no one likes stretching tape to fit, that creates wrinkles.
Here’s the big mistake people make: they stick one end down and then roll it on like a sticker, but they’re pressing too hard or not smoothing evenly. Let’s do this step by step. Peel the first 2-3 inches of the backing off the tape—don’t peel the whole thing at once, that’s a surefire way to get it stuck to itself or the floor. Line that first end up perfectly with your mark (like the seam on a duct), press that 2 inches down firmly, but gently. Then, as you pull the rest of the backing off slowly, use a firm, flat tool to smooth the tape as you go. Wait, what tool? A plastic squeegee, a flat credit card (the ones you don’t need, of course), even a clean cloth works. The key is to move from the middle outward, not just press randomly. That pushes any air bubbles out, so you don’t have those ugly blisters under the tape.
Oh, and don’t pull the tape too tight. I see contractors do this all the time—they stretch the tape to cover a 10-inch seam, pull it super tight, and by the time they’re done, it’s already wrinkling. Aluminum foil is thin, so it’s easy to overstretch. Leave a tiny bit of slack, just enough so it’s laying flat, not tight like a drum. That prevents wrinkles and also makes sure the adhesive has a good bond, not stretched so thin it can’t stick.
What about corners or curves? Those are tricky, right? If you’re applying tape around a 90-degree corner on a duct, don’t try to fold the tape straight across—cut a small slit in the tape where it meets the corner, about ½ inch long. That lets you wrap the two sides around the corner without creating a big, ugly crease. For curves, like a pipe, stretch the tape a little (but not too much!) and work your way around, smoothing as you go. Again, small slits if needed to avoid bunching up.
Now, the finishing touch: pressing the edges. A lot of people ignore the sides of the tape, but those are where leaks happen. Once the whole strip is laid down, go back over every edge with your tool, pressing firmly. If you’re working on ductwork, overlap seams by at least an inch—don’t just butt two pieces of tape together. That overlap creates a better seal. I always tell my customers, “if you can run your fingernail under the edge, it’s not sealed right.” Take 10 extra seconds to press those edges, and you’ll save yourself from calling me next month asking for a replacement roll because the tape peeled.
Wait, let’s talk about common mistakes I see all the time, just to hit these home. First, using the wrong tape for the job. If you’re doing high-temp stuff like a dryer vent, you need a heat-resistant tape—not the regular stuff you use for sealing a box. We sell high-temp aluminum foil tape that can handle up to 500°F, so make sure you’re grabbing the right one. Second, not testing a small piece first. If you’re working on a new surface you’ve never applied tape to, test a 2-inch piece in a hidden spot. Peel it off after 24 hours—if it’s still stuck tight, great. If it comes off easily, that surface might need a different prep (like a primer). Third, ignoring expansion. Aluminum expands in heat, so if you’re applying it to a metal roof in summer, don’t lay it so tight that when the metal heats up, the tape can’t move. Leave a tiny gap at the edges of the tape for expansion.
Let me throw in a real example from last month. A guy named Jake came to us, said he’d tried patching his mobile home’s roof with three different brands of aluminum tape, and all of them were peeling within a week. I asked him what he did—he said he hosed the roof off, wiped it with a dry towel, and slapped the tape on. That’s it. I walked him through prep: sanding the small rust spot, wiping with alcohol, waiting for it to dry. He used our heavy-duty roll, and a week later he texted me a photo—no peeling, no bubbles, smooth as anything. He said he should’ve asked us first, not tried the cheap stuff at the hardware store. That’s why we’re here, right?
Now, if you’re still unsure—maybe you’re tackling a big HVAC job, or a commercial roof repair—don’t hesitate to reach out. We don’t just sell aluminum foil tape; we’ve got techs who can walk you through your specific project, make sure you’re grabbing the right product, and even give you a few extra tricks. No sales pitch here—we’ve been doing this long enough to know a good application is just as important as a good product. Whether you’re a homeowner doing a small repair or a contractor with a big job, we can hook you up with the right tape and the advice to use it right.
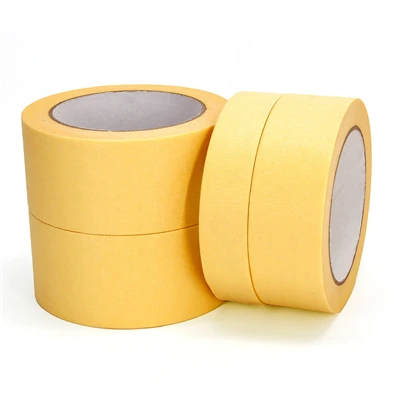
Before I wrap up, let’s recap the steps real quick so you don’t forget: 1) Prep the surface—clean, dry, rust-free. 2) Let the tape adjust to temperature before using. 3) Cut a piece a little longer than needed. 4) Peel only the first 2 inches of backing, line it up, press lightly. 5) Peel the rest slowly, smoothing as you go (middle out, no overstretching). 6) Trim for corners/curves if needed. 7) Press all edges firmly, overlap seams.
Mounting Tape That’s it—no fancy tools, no secret hacks, just simple steps that make all the difference. I’ve applied this stuff a thousand times, and even I still mess up sometimes (last week I cut a piece too short and had to patch another), but these steps fix it every time. If you’re in the market for aluminum foil tape, or if you have questions about your specific job, hit us up to chat through what you need. We’re here to make sure your next project goes smooth, no tape headaches, no wasted rolls.
References
- ASHRAE. HVAC Duct Sealing Best Practices. American Society of Heating, Refrigerating and Air-Conditioning Engineers.
- International Institute of Roofing. Proper Adhesion Techniques for Metal Roofing Materials. 2022.
- National Tape Manufacturers Association. Surface Preparation Guidelines for Pressure-Sensitive Tapes. 2021.
Yiwu Yubang Adhesive Products Co., Ltd.
As one of the most professional aluminum foil tape manufacturers and suppliers in China, we also support custom service. We warmly welcome you to wholesale high quality aluminum foil tape made in China here from our factory. If you have any enquiry about cooperation, please feel free to email us.
Address: 4th Floor, No. 17 Gantang West Road, Yiting Town, Yiwu City, Jinhua City
E-mail: salesmanager@yubangtape.com
WebSite: https://www.yubang-tape.com/
